Marvelous Designer Start
Marvelous Designer Start
After the base mesh was finished, I exported the second lowest subdivision out as a .FBX and imported it into Marvelous designer.
This was my first proper time at creating an outfit in Marvelous so I made sure to watch and read a lot of tutorials before hand, and spent some time playing around and making some practice pieces.

This was my first attempt at a jacket. From here, I felt I had enough knowledge to make a proper start on my character's outfit.
I knew that I wanted my character to wear a dress shirt, trousers, waistcoat, suit jacket and a tie, so I made sure that I researched the type of clothing that was worn back in the Victorian era and based my outfit around designs that I liked.

Here is a simplified moodboard of a selection of the clothes that I want to base my outfit around.
I also looked into how tailors make patterns in real life, and what sort of shapes make up the clothing. I rented out a couple of books from the library; 'Pattern Cutting For Menswear' by Gareth Kershaw and 'Metric Pattern Cutting For Menswear' by Winifred Aldrich which really helped me understand the patterns and gave me great base templates to work off of.


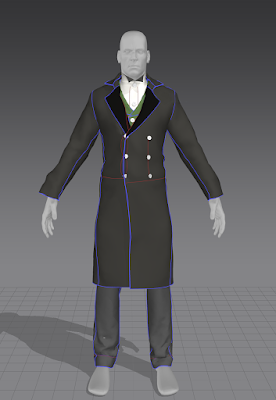
Below are some screenshots of the beginning of my outfit creation process.


The next step from here is to start increasing the particle distance on the fabric for each piece and change the Weft/Warp values in order to get better folds and nice looking draping on the clothing.
Comments
Post a Comment