Posts

Transformation Animation - Unreal Engine

Image
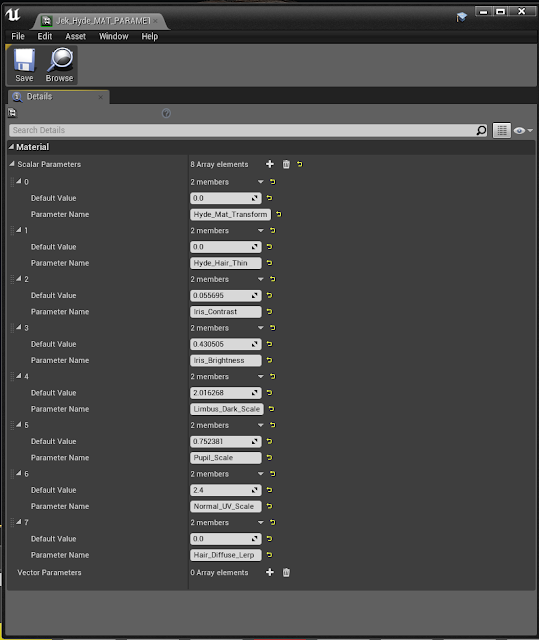
Transformation Animation - Unreal Engine For the Unreal Engine part of the transformation, I ended up using Sequencer to handle everything, as it could be used for the camera, animation and modifying parameter values, all within one track editor, which proved to be really useful. The trickiest part of the transformation was figuring out how to blend between two materials, especially the skin shader as it was complex. For this, I ended up creating two different material functions for the skin shader, one for Jekyll and one for Hyde, then blending them in a material and instancing it, so that I could tweak the skin for both characters, whilst being able to blend between them.  For the blending, I came across a feature called Material Parameter Collections (MPCs), which are basically global scalar or vector parameters that can be used in various ways and accessed through the Sequencer track editor. The great thing about Material Parameter Collections is that the same para

Transformation Animation - Animating in 3ds Max

Image
Transformation Animation - Animating in 3ds Max I decided to animate the morph of my character in 3ds Max using the morpher modifier and the rig from Mixamo. I chose to animate in Max, rather than handling all of the morphs in Unreal as it was quicker this way and I was more confident using Max when it came to animation.  I experimented with a few different animations first to get a feel for how I wanted my character to move and react to the transformation. I made sure that the iterations were rapid so I could rule out what I did and didn't like quickly. When it came to using the Morpher modifier, animating the morphs was fairly straight forward as each morph slider could be keyframed, meaning that it was just a case of setting where I wanted each morph to start and stop. I was originally going to have a transformation including the entire body, however as time went on I realised it would take too long to achieve, so I decided to just stick to the head. The biggest

Substance Designer Brick Material

Image
Substance Designer Brick Material I utilised an old brick material I had previously made and tweaked it a bit to use as a floor plane for the characters to stand on. I used an alpha in Unreal to drive opacity so it fades out at the sides, giving a nice spot light feel, like a monologue at a theatre. Substance Designer material node graph: Unreal Engine material node graph: Floor plane in engine: 

Creating the Cane

Image
Creating the Cane Looking at my scene setup in Unreal, and the pose of my characters, I thought it would be a nice touch to create a cane for Hyde as it would make more sense for his hunch, and also fits with the story better as he has one in the book. I decided to settle for an engraved wooden handle fritz cane as I thought this would work well with Hyde's hand.  Cane reference: For the extruded carving pattern, I painted a mask on the handle and extracted it so it was a separate mesh so that I could easily tweak it without affecting the handle.  I then retopologised and unrwrapped it: Cane in Substance Painter with some Smart Materials: Cane in Unreal Engine:

Redoing The Hair

Image
Redoing The Hair I decided to finish off the hair and finalise all the cards and textures as they still needed some work. When I went back to finish off placing the hair cards, I realised that they were a bit all over the place and not didn't flow very well, so I decided to take the lessons I'd learnt from placing them the first time and re-do the hairstyle. I applied the hair diffuse texture onto a plane with the same ratio and cut and extracted hair strips from it. I then imported these strips into ZBrush and made an IMM brush from them, so that I could place a specific hair card where I wanted easily. This allowed me to pick which hair card and texture would fit best. Extracting hair strips in 3DS Max: Hair strips IMM brush in ZBrush, the top bar allows me to change between various hair cards. I made sure to name them to help when picking. Building up the hair from the back up. The base hair cards are basically opaque to make the overall hair

Changing Hand Geometry

Image
Changing Hand Geometry After some initial posing of my characters, I noticed that the hand was deforming a lot which was revealing the lack of geometry, making the edges look too jagged. It is because of this reason that I decided to go back and change the hand models from the first subdivision to the second. This was an easy enough task as the hands were already unwrapped in ZBrush with subdivisions, so it was just a case of exporting and re-rigging the higher poly hands. Below are the comparisons of the old geometry (left) and the new geometry (right):