Posts

Showing posts from February, 2019

Turnarounds

Image

Starting the Hair

Image
Starting the Hair I decided to make a start on the hair for my character before I had fully finished my character sculpt as I hadn't really made realistic looking hair before so I had a lot to learn, and I would rather spend the time to work out an effective pipeline sooner rather than later to give me time to work out all of the kinks and get some good results. I collated a moodboard of the sort of hair style I wanted my character to have. I found hair styling videos on Youtube to be a good source as they showed multiple views of a haircut. Below is a selection of images from one hairstyle I like in particular: I started off by learning Maya's XGen to create the hair clumps which will be used to obtain the textures for the hair cards. Then, I started placing cards manually using the technique by Tom parker, found here: https://www.3dartistonline.com/news/2015/04/how-do-i-create-real-time-hair-for-games/ The technique utilises the use of t

Taking Clothing into ZBrush

Image
Taking Clothing into ZBrush The method for taking the retopologised clothing into ZBrush was also taken from Ben's 3D Gladiator tutorial. Firstly, I imported the retopologised 'low poly' and the simulated 'high poly' into ZBrush.  Then, to add thickness to the low poly, I used the Panel Loops button found under the Geometry>EdgeLoop tab. This allows control when adding the how thick you want the extrusion to be and how many inner loops you want. Also, by using this method, I was able to keep the thickness consistent on fabric that was similar. Once the thickness was added to the low and high poly meshes, I used the 'Project All' button to conform the low poly geometry to the high poly, stepping up one subdivision at a time until the low poly mesh was dense enough to attain all of the projected detail. Low poly mesh with thickness: High poly mesh with thickness: Projecting high poly onto low poly: This pro

Retopologising the Garments

Image
Retopologising the Garments Before retopologising the Marvelous Designer simulation, I researched into the best method for doing so and found an in-depth tutorial from 3D Gladiator found here: https://www.3dgladiator.com/tutorials/marvelousdesigner/ Simulated garment export: Flat garment Export: The tutorial process involves exporting both the simulated and flat garment geometry from Marvelous. This is then imported in 3DS Max ready to be retopologised. To keep things simple and clear, I exported and retopologised all of the garments separately to stay organisefd. Simulated and Flat garments imported into Max: Retopolgising the flat garment geometry using Max's freeform tools: Below is the final scene required to retopologise the garment using 3D Gladiator's script.  Basically what the script does is takes the retopologised pieces of the garment, seperates them into individual objects, aligns them with the flat Marvelous g

Finalising in Marvelous Designer

Image
Finalising in Marvelous Designer   Moving forward with Marvelous Designer, I experimented with having the jacket open and closed, by doing this I was able to double check the proportions and fitting around my avatar.  I decided that I wanted to keep the jacket open as I felt it would look better in engine as I could add cloth physics, also if I had left it closed, the vest and trousers would be concealed which I didn't want.   I also experimented with adding a utility belt for my character in which I would put potions or vials. After finalising the garments to a point where I was happy with how they fit my character, I went back over each piece and increased the Particle Distance as well as changing the Weft and Warp values in order to increase or reduce folds in the clothing. Marvelous Designer has presets for different materials which were a good starting point, however they weren't giving me the folds that I wanted.  After

Refining the Face and adding Teeth

Image
Refining the Face and adding Teeth Moving forward, I started to develop my character's facial features more and get them closer to my reference and idea. This was just a case of a lot of small changes, constantly referring to my moodboard and anatomy reference. I added the changes on seperate layers in ZBrush so that I could compare changes, and I could easily revert back if I didn't like the look of what I'd sculpted. This also allowed me to blend between different layers, giving me more variety and control over which features I liked. An important feature which was missing were the teeth. Adding the teeth helped with the sizing of the mouth, and made me see changes which needed to be made in the face in order for them to look right. For the teeth, I found that reference of dentures helped a lot as the pictures were close up and could get a 360 shot compared to pictures from inside people's mouths. I wanted to make my character's teeth

Morph Target Practice

Image
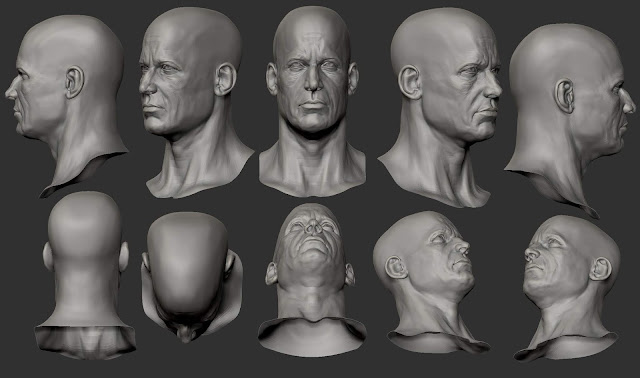
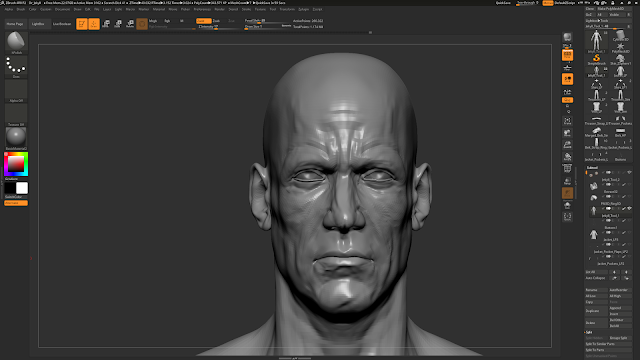
Morph Target Practice In order to find out if the my idea for my project would be feasible, and to understand the process of animating the morph targets on my character, I carried out a basic test in Unreal Engine 4. Firstly, I created a deformed variation of my model in ZBrush using the same mesh, so it had the same geometry and UVs. I then exported both the high and low poly models of the man and deformed man, then imported them into 3DS Max. I used the Morpher modifier in Max to pick the deformed mesh for my model to morph into. I then exported the original male mesh ready for use in Unreal. Inside Unreal Engine, I used the Normal maps for both of the models, which I had previously baked in Substance Painter, and set them up to blend in a material. I then made an instance of that material so that I could change the properties of the parameters I had exposed. Inside Unreal, I used the 3rd Person Character template to give me a start with a ca

Marvelous Designer Start

Image
Marvelous Designer Start After the base mesh was finished, I exported the second lowest subdivision out as a .FBX and imported it into Marvelous designer. This was my first proper time at creating an outfit in Marvelous so I made sure to watch and read a lot of tutorials before hand, and spent some time playing around and making some practice pieces. This was my first attempt at a jacket. From here, I felt I had enough knowledge to make a proper start on my character's outfit.  I knew that I wanted my character to wear a dress shirt, trousers, waistcoat, suit jacket and a tie, so I made sure that I researched the type of clothing that was worn back in the Victorian era and based my outfit around designs that I liked.   Here is a simplified moodboard of a selection of the clothes that I want to base my outfit around. I also looked into how tailors make patterns in real life, and wh

Base Sculpt Start

Image
Base Sculpt Start Once I had a good starting point idea and enough reference and research to begin, I started sculpting the base body of my character. I used a base mesh that I had previously made as it was quicker to work with than from a sphere, and also had good topology and UVs. When sculpting the anatomy of my character, I tried keeping the detail consistent throughout as I went along, rather than detailing one part at a time. I used a lot of anatomical reference, one really useful source being digital scan data as they have multiple angles of a model in good lighting conditions which really helps identify the important shapes and folds. I kept in mind the body type I wanted to create throughout this process as I didn't want to make my character overly muscular, which is a hard task when most anatomy reference is. First Pass                                                                                                         Second Pass