Taking Clothing into ZBrush
Taking Clothing into ZBrush
The method for taking the retopologised clothing into ZBrush was also taken from Ben's 3D Gladiator tutorial.
Firstly, I imported the retopologised 'low poly' and the simulated 'high poly' into ZBrush.
Then, to add thickness to the low poly, I used the Panel Loops button found under the Geometry>EdgeLoop tab. This allows control when adding the how thick you want the extrusion to be and how many inner loops you want. Also, by using this method, I was able to keep the thickness consistent on fabric that was similar.
Once the thickness was added to the low and high poly meshes, I used the 'Project All' button to conform the low poly geometry to the high poly, stepping up one subdivision at a time until the low poly mesh was dense enough to attain all of the projected detail.
Low poly mesh with thickness:
High poly mesh with thickness:

Projecting high poly onto low poly:

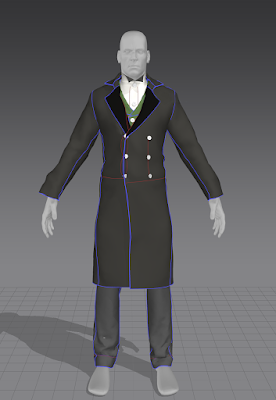
This process was repeated for all of the pieces of clothing then inserted into the scene with my character. From there it was just a case of sculpting and making adjustments to the outfit, making sure to follow reference.
Below is my current progress on the clothing sculpt.


Comments
Post a Comment